
The "Crafting Menu" as it appears to the left on your screen - here the "Structures" tab is open.
Crafting parts can be seen in the hotbar on the left side of your screen. They make up all the different things you can build in the game.
Overview of parts
Here's an overview of the different crafting parts available at the start of the game. Feel free to expand this table yourself as you unlock tech. Each section below contains info on what resources are needed to build each part, and what each part is used for. Getting to know the different crafting parts will allow you to experiment and come up with completely new types of machines. You can also unlock new tech leading to new crafting parts, as you gain levels.
| Structures | Transport | Boilers | Engines | Circuits | Machinery | Control | Weapons | Accessories |
|---|---|---|---|---|---|---|---|---|
| Planks | Wheel 2 | Copper Boiler | Aeolipile Engine | Pipe | Health Generator | Copper Lever | Spike | Lamp |
| Plate | Wheel 3 | Tiny Tank | Engine | Belt | Door | Lever | Railgun | Storage Box |
| Coupling | Wheel 4 | Boiler | Engine Small | Cable | Hopper | Switch | Ballista | Candlelight |
| Copper Coupling | Copper Wheel | Steel Spike* | Air Pump* | Pressure Plate | Bomb | Bed | ||
| Ladder | Wheel 7 | Air Tether* | Timer | Saw Blade* | Sofa | |||
| Flux Antenna | Balloon* | Hatch* | Converter | Toilet | ||||
| Bricks | Propeller* | Pressure Tank* | Bookshelf | |||||
| Foundation | Screw* | Storage Chest* | ||||||
| Storage Safe* |
Locked tech is marked with an asterix (*).
Structures

All of the structures initially available in the game, forming a small pyramid.
In order to build static, solid objects, you need structures. By laying out a Foundation first, you can build shelters, houses, or even build armor for vehicles.
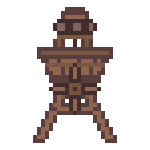
To the right, you'll see an image depicting all the Structures in the game connected to form a small pyramid. From the top and down: Flux Antenna, Copper Coupling, Coupling, Planks, Plates, Bricks, Foundation - and a tiny Ladder connecting the Foundation with the Brick layer, right at the bottom. This particular structure isn't very useful for anything other than showing all the Structures.
Planks
 A block that you can build with. It's fragile, and appears very appetizing to most mobs.
Build: Use 0.25xWood to build this item.
Plate
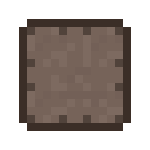 Plate block that is sturdier than planks. Probably tastes metallic in a bad way.
Build: Use 0,2x
Coupling
 A block that you can use to connect things with. The main difference between this type and Copper Coupling is appearance.
Build: Use 0,2x
Copper Coupling
 A block that you can use to connect things with. The main difference between this type and Coupling is appearance.
Build: Use 0,2x
Ladder
 A wooden ladder, useful for climbing up and down structures and large vehicles. Ladders are often necessary when building very large and complicated machinery. Press "up" when standing in front of the ladder to go up, and press "down" to go back down.
Build: Use 0,25x
Flux Antenna
 Captures flux energy when moving in phase with the underlying aether.
Build: Use 0,5x
Bricks
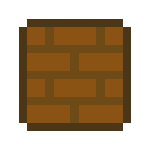 Bricks, for bashing skulls in. Brick also makes quite a good building material - it's sturdy, hard to chew through, and heavy - ideal for shelters.
Build: Use 0,25x
Foundation
 Foundation, which is used to create the basis for static structures. You will need to build a Foundation first, when you want to build wooden or brick shelters.
Build: Use ??? to build this item.
Transport


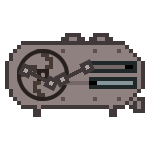
The tutorial vehicle with two Copper Wheels attached.
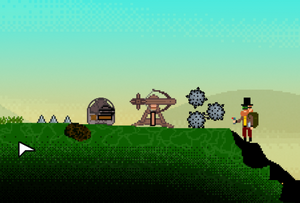
This section mostly consists of different types of wheels, but also some tech (unlocked later in the game) that can lift or propel vehicles through water or air. By adding a wheel or other, similar contraption to whatever you build, and combining it with motorization parts, you can drive, fly or sail at different speeds, and even mobilize weapons, which comes in handy when up against particularly challenging foes.
To the right, you'll see an image depicting a standard vehicle. Specifically, the first one you're required to build in order to cross the piranha-infested pond shortly after starting the game. It has two Copper Wheels attached to its bottom. You'll soon realize that this vehicle is quite slow, and so you'll probably want to build something more efficient as you progress.
Wheel 2
A Wheel made from Wood. It's about 2 diameters wide. Best suited for small vehicles.
Build: Use 1x
Wheel 3
A Wheel made from Wood. It's about 3 diameters wide. Best suited for small or medium-sized vehicles.
Build: Use 1,5x
Wheel 4
A Wheel made from Iron. It's about 4 diameters wide. Best suited for medium-sized, sturdy vehicles, or mobilized combat machines.
Build: Use 2x
Copper Wheel
A Wheel made from Copper. It's about 4 diameters wide. Best suited for medium-sized, light vehicles.
Build: Use 2x
Wheel 7
A Wheel made from Iron. It's about 7 diameters wide, and thus the largest pre-built wheel in the game. Best suited for large and sturdy vehicles, or mobilized combat machines.
Build: Use 3,5x
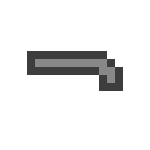
Screw*
 * Unlockable Tech
Underwater propeller usable for submarines and torpedoes.
Build: Use 2x
Ballon*
 * Unlockable Tech
A yellow lift balloon attached to a hydrogen tank.
Build: Use 1x
Propeller*
 * Unlockable Tech
A propeller that can push your vehicle forwards and backwards.
Build: Use 2x
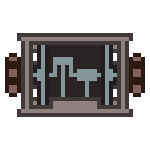
Boilers


All of the game's initially available boilers, lined up. From left to right: Tiny Tank, Boiler, and Copper Boiler.
Can be used together with engines to create the basis of a machine. A boiler needs fuel in order to work. Select fuel by left-clicking on for example Water in your inventory, then left-click on the boiler you've built and placed in the world in order to load the fuel. Adding the minimum amount of fuel (for instance x2 Water) will not entirely fill up the boiler, but it will make it run for a tiny while. You might be able to make it last long enough to find more fuel this way, but try to fill up your tank as much as possible.
Copper Boiler
Heats water until boiling point, so that steam is produced. This is the first boiler you'll build in Mechanic Miner, so you'll quickly become familiar with its needs and uses. Combine this boiler with an engine, a steering mechanism, wheels, and maybe even a weapon and a light source, in order to traverse most of the initially available area.
Build: Use 2x Copper to build this item. Fuel: Needs
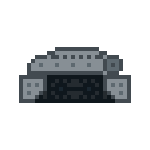
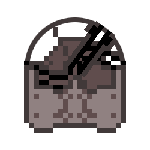
Tiny tank
![]()
Tank container that stores compressed air.
Build: Use 2x
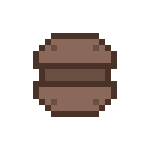
Boiler

Like the Copper Boiler, it heats water until boiling point, so that steam is produced. This boiler is big and quite sturdy, since it's made from iron.
Build: Use 2x
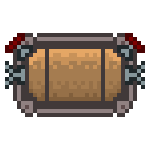
Engines


All of the game's initially available Engines, lined up. From left to right: Aeolipile Engine, Engine, and Small Engine.
Can be used together with boilers to create the basis of a machine. Attach a steering mechanism to an engine connected with a boiler in order to turn on and use your machine.
A boiler needs fuel in order to work. Select fuel by left-clicking on for example Water in your inventory, then left-click on the boiler you've built and placed in the world in order to load the fuel. Adding the minimum amount of fuel (for instance x2 Water) will not entirely fill up the boiler, but it will make it run for a tiny while. You might be able to make it last long enough to find more fuel this way, but try to fill up your tank as much as possible.
Aeolipile engine

Primitive engine that creates rotational energy from steam power. Connecting this engine to a Copper Boiler will give you the basis for the game's tutorial vehicle.
Build: Use 4x
Engine
Converts steam into rotational energy. The engine is more sturdy than the small engine - it works well for weaponized machines and vehicles.
Build: Use 4x
Small Engine
![]()
Converts steam into rotational energy. The Small Engine is smaller, cheaper and less sturdy than the Engine. This makes it better suited for small vehicles and quick, basic machines.
Build: Use 2x
Circuits


All of the game's initially available Circuits. From top to bottom: Pipe, Belt, Cable.
Can be used to connect machine parts and transfer fuel.
Pipe
An Iron cylinder used to transfer steam or gas. Use this when you have to or want to place machine parts further away from each other, for instance boilers and engines. This can also be very useful when you want to connect several machine parts to something, as well as when you want to build quite large machines.
Build: Use 0.10
Belt
A looped band that can be used to transfer transportation.
Build: Use 0.10
Cable

A cable that can transfer control. You need to use Cables to connect a long-range weapon to a lever when building a vehicle with weapons. Place the cables so that they form a line between the weapon (f.i. a Ballista) and a Lever - make sure that there is room enough between both items for the cables to be placed, and make sure that weapon and lever are both build onto the vehicle. Simply placing either on a vehicle after building the on the ground will not automatically connect them to the rest of the machine.
Build: Use 0.10
Machinery


All of the game's initially available machinery in and on a primitive shelter. Leading into the shelter is a door, inside you see a health generator loaded with Protein, and on top of the shelter is a Storage Box with a Hopper attached.
Includes ready-for-use devices, which can be used on their own or plugged onto something you've built.
Health Generator
A device that generates (restores) health to the player by using Protein. The generator uses Protein the same way boilers use fuel - this also means that you should be careful to only load as much Protein into it as you need, since you won't get the remaining Protein back by dismantling the generator.
Build: Use 5x
Door
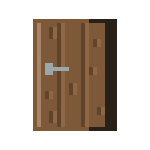
Can be opened and used for buildings as well as enclosed vehicles. The Door works especially well when connected to a mechanism like the pressure plate - this way you can build traps for mobs, which is useful for harvesting materials.
Build: Use 2x
Hopper

Can be used to transfer resources in and out of an inventory.
Build: Use 2x
Air Pump*
 * Unlockable Tech
Pumps air via connected air hoses to nearby Air Tethers. Useful for areas with poisonous atmospheres.
Build: Use 4x
Air Tether*
 * Unlockable Tech
A fastening point that connects air hoses and vents air. Useful for areas with poisonous atmospheres - should be connected to an Air Pump.
Build: Use 1x
Hatch*
 * Unlockable Tech
Can be opened and used for enclosed vehicles. A Hatch is particularly useful when building an armored vehicle.
Build: Use 2x
Pressure Tank*
 * Unlockable Tech
Can be used to fill an enclosure with Water.
Build: Use 6x
Controlling Mechanisms


All of the game's initially available steering mechanisms lined up. From left to right: Copper Lever, Lever, Switch, Pressure Plate, Timer, Converter.
Includes steering mechanisms and switches. Use together with machines that have engines to assume control over them, steer them, turn them on and off, and more.
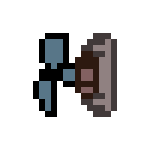
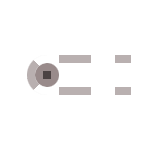
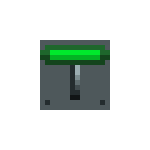
Copper Lever
A basic and cheap Copper lever that operates machinery.
Build: Use 2x
Lever
A sturdy Iron lever that operates machinery.
Build: Use 2x
Switch
A switch that turns on and off. Very popular with installation of lights, but also good for a variety of other uses.
Build: Use 0.50x
Pressure Plate
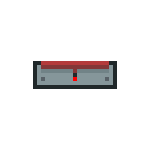
A plate that emits a cable signal when pressed down. You can connect the plate to for instance a door, in order to be able to control doors more directly, or even remotely.
Build: Use 3x
Timer

A timer that adds a delay to cable signals. Connect the timer to a Pressure Plate and a Door, for instance, in order to open and close a door remotely while you're busy doing something else.
Build: Use 1x
Converter

Build: Use 1x
Weapons

All of the game's initially available steering mechanisms lined up. From left to right: Three Spikes, a Railgun, a Ballista, and three Bombs.
For hurting creatures and other squishy things until they die. Weaponry can be installed onto vehicles, traps, shelters, and everything in between.
Spike

A sharp and durable Spike, which can be placed on the ground or installed onto moving machines.
Build: Use 2x
Railgun
A weapon that continuously shoots small, aimed stone pebbles. The Railgun is quite expensive, and therefore not available at the start of the game, but it's extremely useful, particularly when you're up against large and fierce enemies. In order to get Manganese, which is required to build the Railgun, you need to enter and explore some very dangerous areas.
Build: Use 3x
Ballista
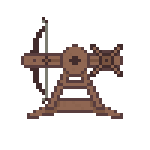
A weapon that fires wooden arrows. If you install the Ballista onto a vehicle, and connect the vehicle's steering mechanism with the Ballista using Bakelite, you can drive, aim, and shoot at the same time. This way, you can simultaneously pursue or escape an enemy while damaging it. This is very handy for fast-moving enemies and bosses.
Build: Use 5x
Bomb

An explosive device that detonates on impact. Bombs do not work as traps - they have to be launched, and will then do damage on impact. Note that the Bomb cannot be disassembled and harvested after use, as most other machines and items can. It's a one-time use item. Once it collides with an enemy, it will do damage and then disappear... You cannot place a Bomb and wait for enemies to touch the Bomb, however. You need to launch it or drop it directly onto and enemy or a surface.
Build: Use 4x
Steel Spike*
*Unlockable Tech
A sharp, durable spike.
Build: Use 2x
Sawblade*
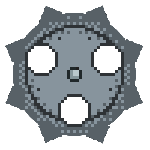 *Unlockable Tech
A deadly weapon, once it starts to rotate at great speed.
Build: Use 10x
Accessories


All of the game's initially available Accessories. From left to right: Toilet, Lamp, Storage Box with Candlelight on top, Bookcase, Bed and Sofa.
Some of these items are only for show; others are quite necessary for effective exploration and combat. Use a storage box to store extra items when your inventory is full, and use lamps and candlelight to light up dark places.
Lamp

A light source. You can attach a Lamp to a vehicle for more effective cave exploration, or build a Lamp and carry/throw it around as you run.
Build: Use 2x
Storage Box
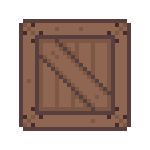
Storage space is an underestimated, but necessary component in Mechanic Miner. Build a this box when you want to store excess items, or keep all your items safe while you explore dangerous areas. Note that this box is wooden, and therefore easily destroyed by enemies. Once destroyed, the content is lost forever.
Build: Use 2x
Candlelight

A small light source. The candle fits more easily on a small vehicle than the Lamp, and its effect is more or less the same.
Build: Use 1x
Bed

A comfy bed to sleep in. Sligthly useless, otherwise, but may make an interesting vehicle, with some effort.
Build: Use 2x
Sofa

A comfy sofa to sit on. See above.
Build: Use 2x
Bookcase

Shelves with books. See above.
Build: Use 2x
Toilet

When you gotta go, you gotta go. See above.
Build: Use 1x
Storage Chest*
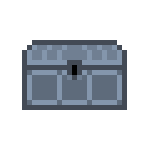 *Unlockable Tech
A small, sturdy Iron chest for storing your items. Slightly roomier than the Storage Box. Good for the wealthy yet busy miner.
Build: Use 5x
Storage Safe*
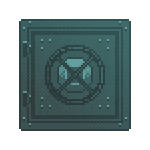 *Unlockable Tech
A big, heavy Iron safe for storing your items. This safe offers ultimate security for your hard-earned Materials - you'll never have to worry about mobs chewing through your stuff while your back is turned, ever again. Call 555-SAFEMENOW and order this premium package for only 100x Iron. Honestly, can you afford not to?
Build: Use 100x